Deploy your Bun & Elysia application at Fly.io with wildcard domain
At first glance, What is mean by wildcard domain? And what is it used for? Let's understand it thoroughly.
Wildcard subdomains open up many interesting possibilities for building dynamic, user-centric web applications. Here are some project ideas that could leverage wildcard subdomains effectively:
- Multi-tenant SaaS Platform (eg. Acme Inc.)
- Personal Portfolio Network
- Blogging Platform
Each user gets a blog at broisnees.yourblog.com Customizable themes and layouts per subdomain, you can take the example medium. You got what i mean, and you can also leverage wildcard subdomains to host your own domain. we will go through how can we actually use it.
In this blog, I have only used the single service but in your sceneriao you can also use the server, ( ngnix, caddy ) then locate to your different webapp. here is the demo configuration of ngnix and caddy.
# ngnix
server {    listen 80;    server_name example.com;    return 301 https://www.example.com$request_uri;}
server {    listen 80;    server_name www.example.com;    location / {        proxy_pass http://main_page_backend;    }}
server {    listen 80;    server_name *.example.com;
    location / {        if ($host ~* ^console\.) {            proxy_pass http://admin_backend;        }        if ($host ~* ^(?!console\.).+\.example\.com$) {            proxy_pass http://user_backend;        }    }}
upstream main_page_backend {    server backend1.example.com;    server backend2.example.com;}
upstream user_backend {    server user1.example.com;    server user2.example.com;}
upstream admin_backend {    server admin1.example.com;    server admin2.example.com;}
Nginx:
- The server_name directive is used to match domains.
- The location block handles the proxying to the appropriate backend based on the domain. upstream directives are used to define load-balanced backends.
#  caddy
example.com {    redir https://www.example.com{uri}}
www.example.com {    reverse_proxy main_page_backend}
*.example.com {    @console {        host console.example.com    }    reverse_proxy @console admin_backend
    @user {        not host console.example.com    }    reverse_proxy @user user_backend}
main_page_backend {    to backend1.example.com backend2.example.com}
user_backend {    to user1.example.com user2.example.com}
admin_backend {    to admin1.example.com admin2.example.com}
Caddy:
- Caddy uses reverse_proxy to handle requests and balance the load across backends.
- The @console and @user matchers are used to route requests to the correct backend based on the domain.
ok let's go to todays project.
Setting Up the Project
Projects includes multiple tools and technologies.
Bun, elysia, neon serverless pg, drizzle, flyio, cloudflare, docker
Let's create the project using the starting elysia command **bun create elysia
myapp**, after you initialized your project using elysia, you can run the project then it should run on port 3000.
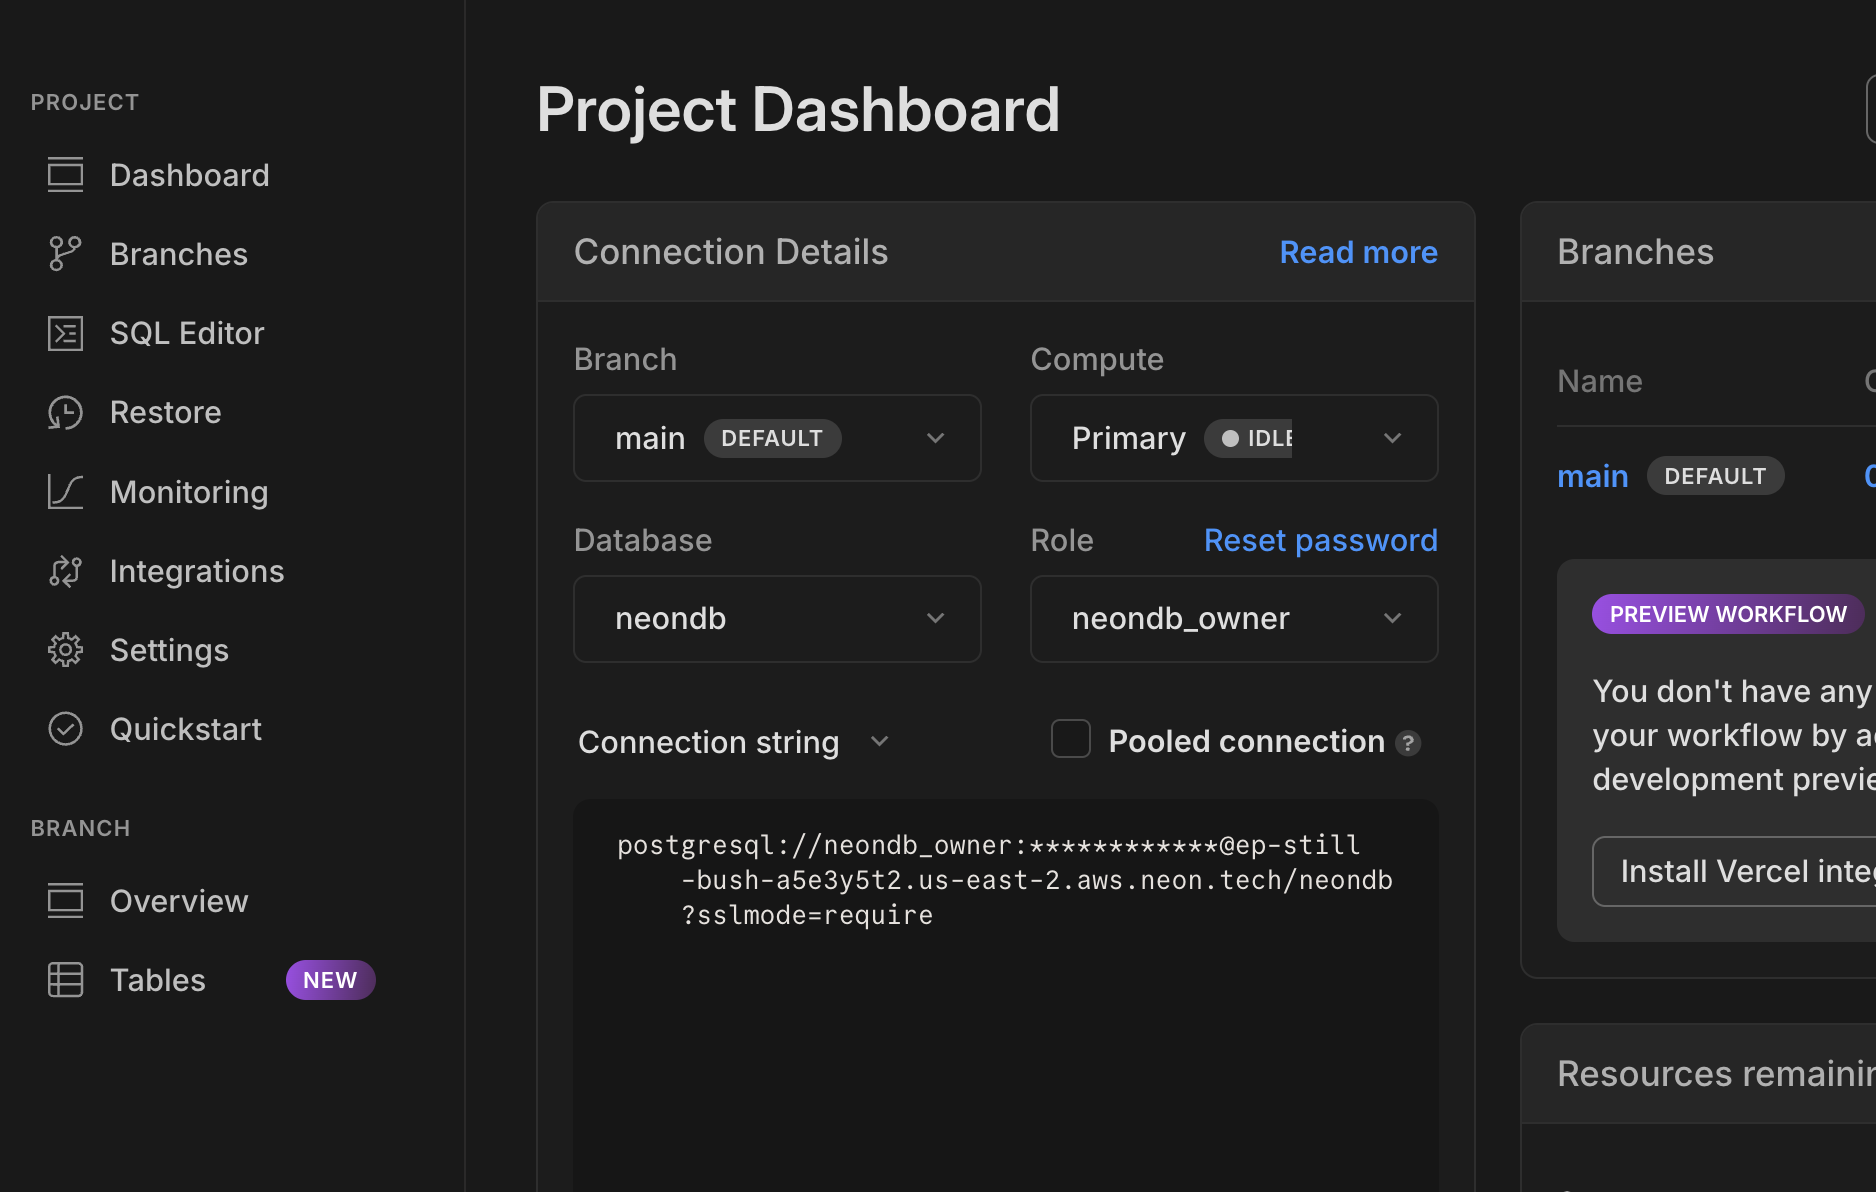
For database Today I am going to use the neon serverless postgres database
setup with drizzle orm, which is my favourite goto orm.
You can checkout the refrence repo of my Github.
inside of the src folder you will find the index.ts file which is the main
entrypoint file. before it, we are going to create the db folder inside of the
src folder,
db/index.ts
import { neon } from '@neondatabase/serverless';import { drizzle } from 'drizzle-orm/neon-http';import * as schema from './schema';
if (!process.env.DATABASE_URL) {  throw new Error('Database credentials missing.');}
export const sql = neon(process.env.DRIZZLE_DATABASE_URL!);
const db = drizzle(sql, {  schema,});
export { schema, db };
also you should create the drizzle.config.ts in your root dir, if you are not
very familier with drizzle checkkout their
docs.
import type { Config } from 'drizzle-kit';
export default {  schema: './src/db/schema/index.ts',  out: './drizzle',  dialect: 'postgresql',  dbCredentials: {    url: String(process.env.DRIZZLE_DATABASE_URL),  },  verbose: true,  strict: true,} satisfies Config;
Now we are going to create the db/schema/index.ts file inside of the db
folder.
import { integer, pgTable, serial, text, timestamp } from 'drizzle-orm/pg-core';
export const usersTable = pgTable('users_table', {  id: serial('id').primaryKey(),  name: text('name').notNull(),  age: integer('age').notNull(),  email: text('email').notNull().unique(),});
export const postsTable = pgTable('posts_table', {  id: serial('id').primaryKey(),  title: text('title').notNull(),  content: text('content').notNull(),  userId: integer('user_id')    .notNull()    .references(() => usersTable.id, { onDelete: 'cascade' }),  createdAt: timestamp('created_at').notNull().defaultNow(),  updatedAt: timestamp('updated_at')    .notNull()    .$onUpdate(() => new Date()),});
export type InsertUser = typeof usersTable.$inferInsert;export type SelectUser = typeof usersTable.$inferSelect;
export type InsertPost = typeof postsTable.$inferInsert;export type SelectPost = typeof postsTable.$inferSelect;
Ok we are now finished with the databse files, one last thing is to modify the
main entrypoint file, src/index.ts
import swagger from '@elysiajs/swagger';import { Elysia } from 'elysia';import { db, schema } from './db';import { eq } from 'drizzle-orm';
export function getCname<T extends Request>(req: T) {  return req.headers.get('host')?.split('.')[0];}
const app = new Elysia()  .use(swagger())  .derive(({ request }) => {    return { cname: getCname(request) };  })  .get('/', async ({ cname }) => {    const user = await db.query.usersTable.findFirst({      where: eq(schema.usersTable.name, cname!),    });
    if (!user) return `You do not have the access.`;
    return `Hello, ${cname}`;  })  .listen(process.env.PORT!);
console.log(  `🦊 Elysia is running at ${app.server?.hostname}:${app.server?.port}`,);
If you have noticed we have been using two environment which is port and
DATABASE_URL
PORT=8080You can find out the database url in the neon project dashboard.
We are done with setting up the code base. now we are going to deploy it.
If you don't have fly cli installed in your pc, use brew install flyctl to
install fly in your machine, or checkout fly.io for more
fly launchWhen using this command if you are not authorized it will ask you to login, after login it will setup the configuration and as it detects the bun application it setups the fly.toml file.
It will generate the dockerfile for you, if not here is the simple dockerfile for bun
FROM oven/bun as baseLABEL fly_launch_runtime="Bun"WORKDIR /appENV NODE_ENV="production"# ENV DATABASE_URL=""FROM base as buildRUN apt-get update -qq && \ apt-get install -y build-essential pkg-config python-is-python3# Install node modulesCOPY --link bun.lockb package.json ./RUN bun install --ci# Copy application codeCOPY --link . .FROM baseCOPY --from=build /app /appEXPOSE 8080CMD [ "bun", "run", "dev" ] # Start the server by defaultAlso fly lauch will create the fly.toml file in your root directory. which
looks like this
app = 'mydocsbackend'primary_region = 'ams'
[build]
[env]PORT = '8080'
[http_service]internal_port = 8080force_https = trueauto_stop_machines = 'stop'auto_start_machines = truemin_machines_running = 0processes = ['app']
[[vm]]memory = '512mb'cpu_kind = 'shared'cpus = 1
But before that we need to deploy the database, so we can use the deploy flag in the fly.toml to run the migrate command and deploy the database
[deploy]release_command = "bun run migrate"Here is the package.json script
"scripts": { "test": "echo \"Error: no test specified\" && exit 1", "dev": "bun run --watch src/index.ts", "migrate": "npx drizzle-kit migrate", "db:push": "bunx drizzle-kit push", "generate": "bunx drizzle-kit generate" } "dependencies": { "@elysiajs/swagger": "^1.1.0", "@neondatabase/serverless": "^0.9.4", "drizzle-orm": "^0.32.1", "elysia": "latest", }you can use either db:push or migrate, db:push will push the db server, now we are everything setup for deployment to fly io
#deploy the applicationfly deployAfter successful deployment you should see and fly.io gives the hostname for your application in my case it's mydocsbackend.fly.dev and you can access your app
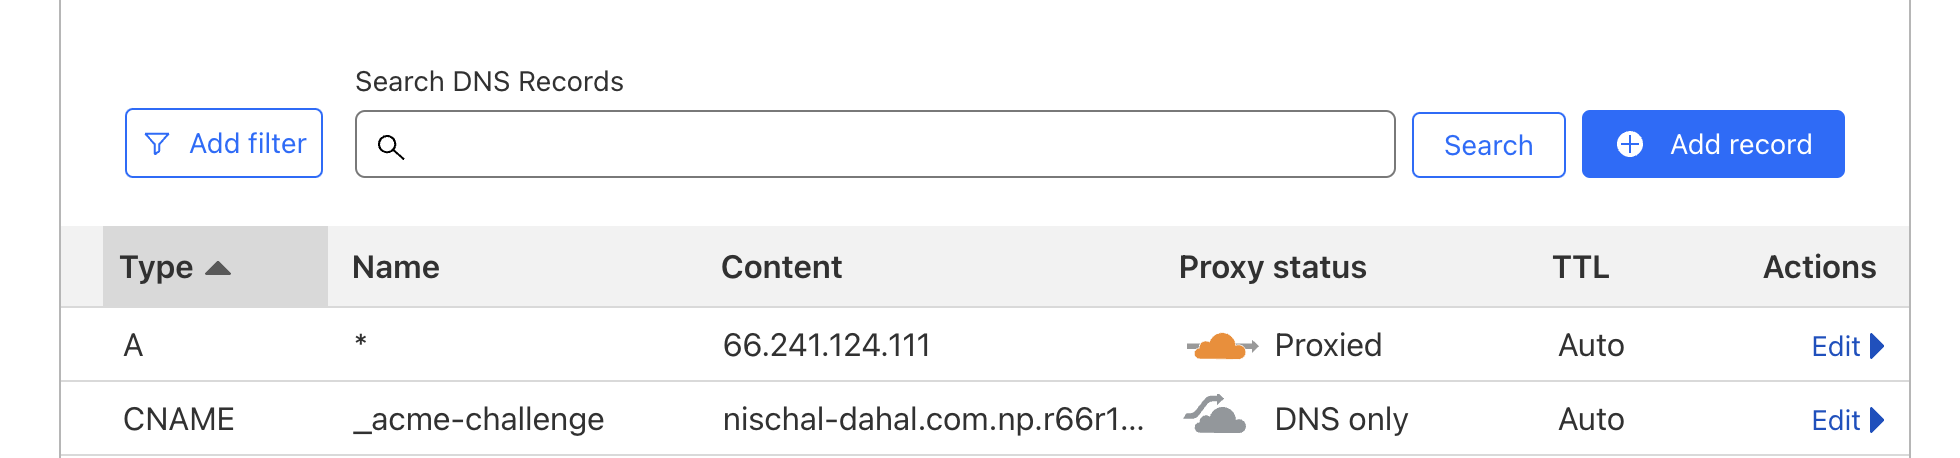
Cloudflare DNS and fly.io custom domain configuration
Go to your cloudflare account and click on DNS and then Add Record
So where did i get this ipv4 hostname from? It's from fly.io, if you go to
fly.io in your app dashboard you will see certificates
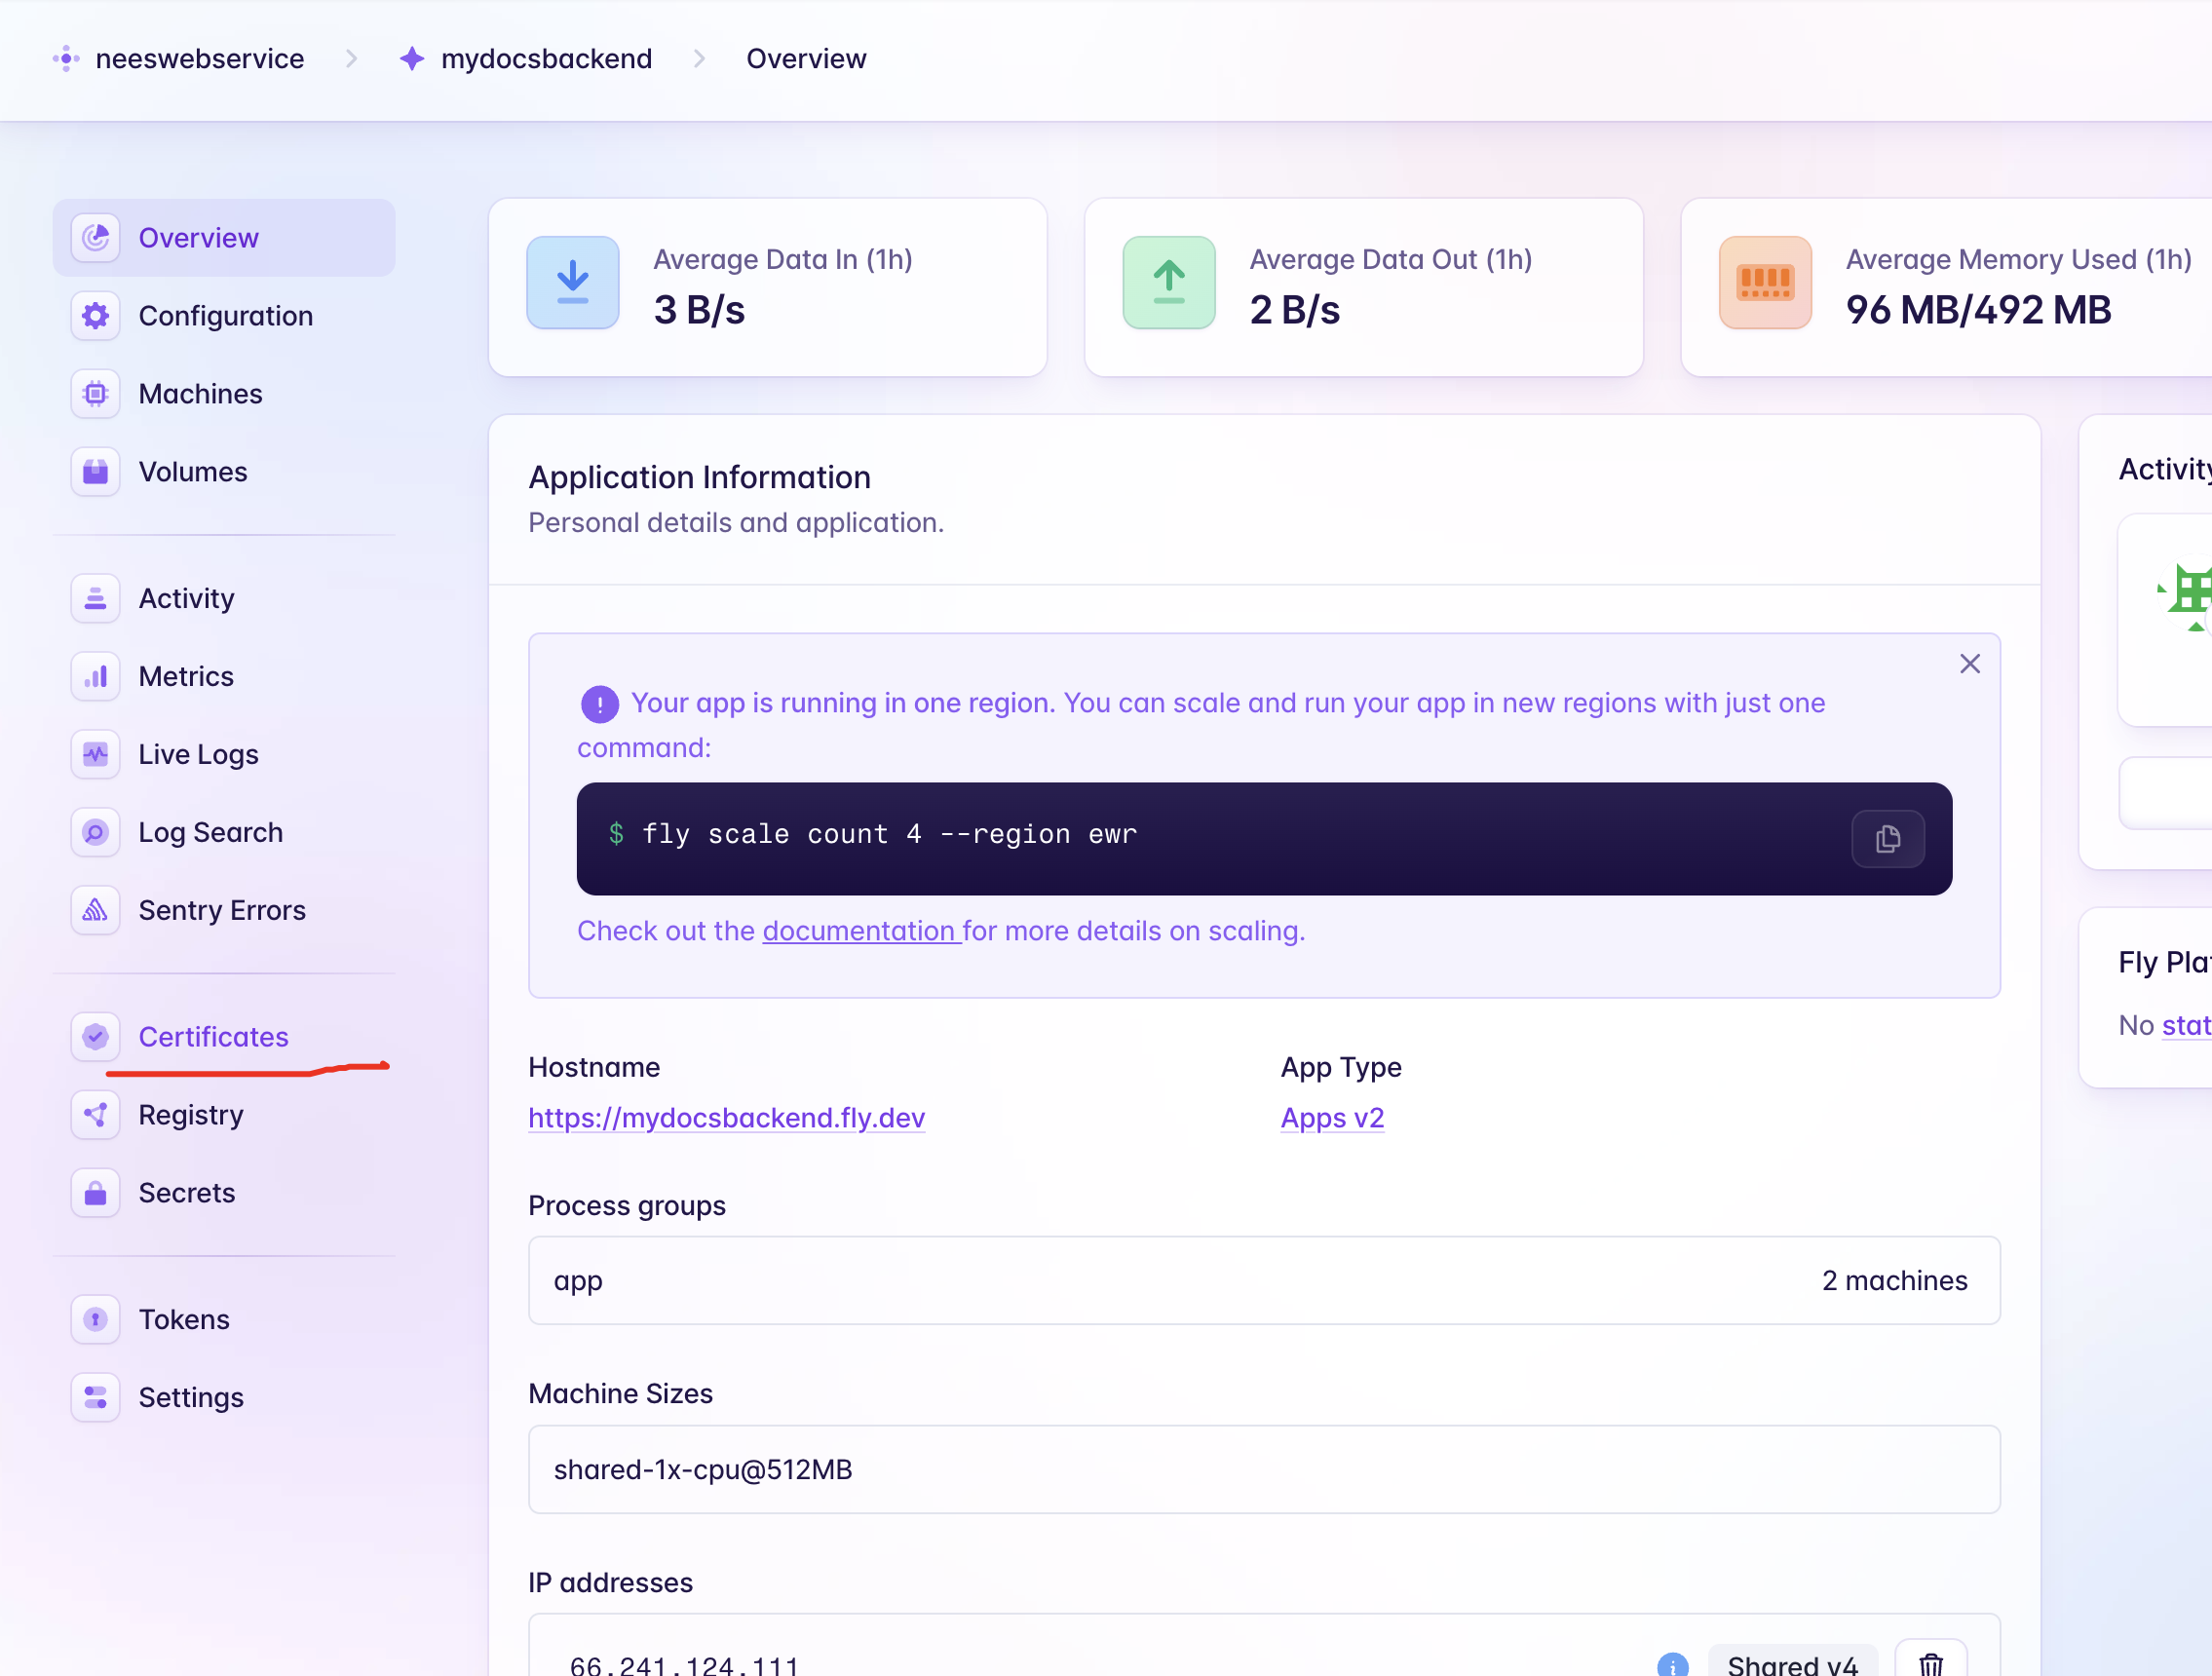
you need to add new certificate pointing to your website here in my case it's *.nischal-dahal.com.np, here I don't have .com domain so i am using the country level domain.

You won't be able to see the green dots in verified and rsa, ecdsa check at the first time, you need to add the _achme_challange CNAME find out in Domain ownership verification , pointing to the value that is given by fly.io, then after sometime it will be verified and ready to go.
We are ready to hit our api from our own wildcard domain,
if you had looked at the index.ts in the src directory, you will see some
simple code, it's just a simple api with bun, where i am getting name of user
from the user database from our neon db, and if found show the hello, message
else no authorized
Example

because test doesnot exists in our database.
I haven't created the seed script, you can create or add the data on your user
table using drizzle-kit studio npx drizzle-kit studio
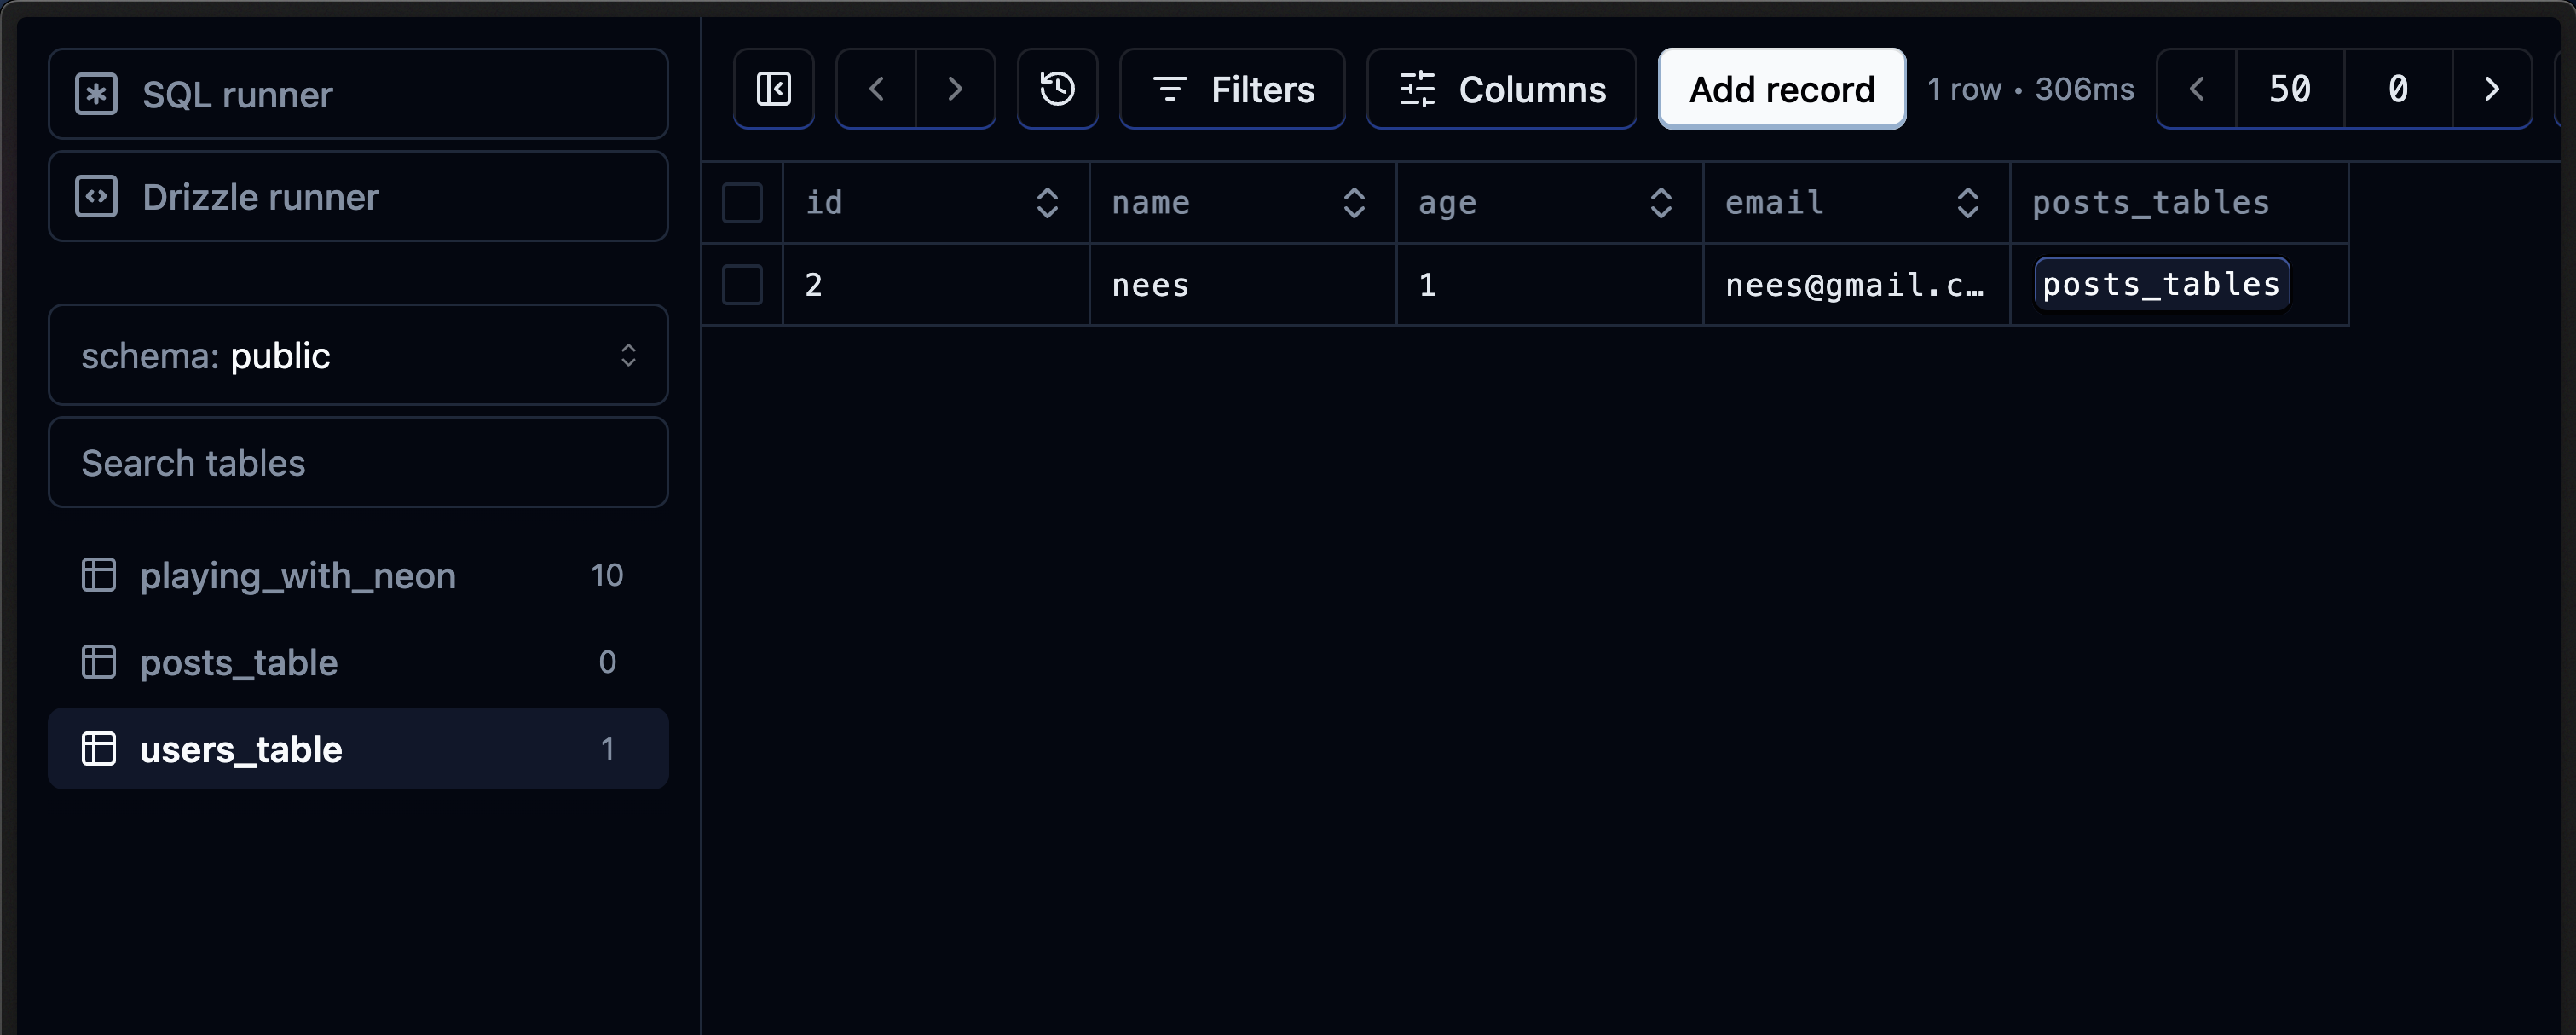
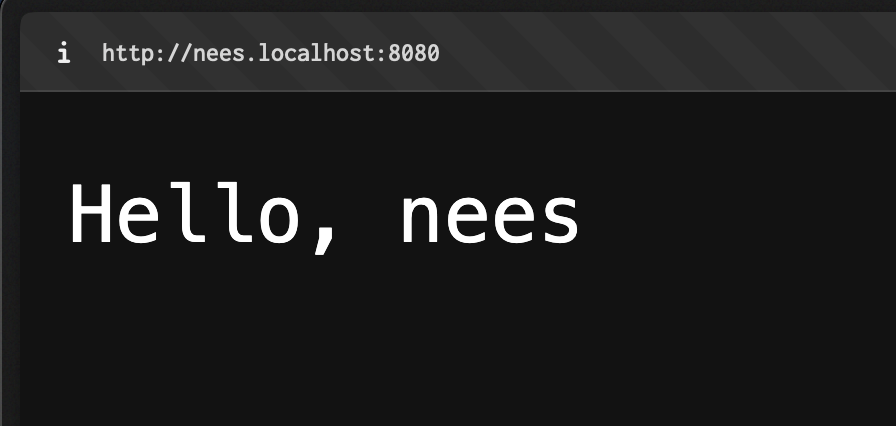
Add record manually, now let's try out nees.localhost:8080,
Did you know?
You can use the
subdomainin localhost.
Now you can also check it on production, it should give you the same result. If
you haven't deployed after changes, you can use fly deploy

Conclusion
We setup, deployed and tested our bun, elysia and drizzle projects on fly.io you can use other hosting platforms as well, like railway,coolify and many more